It had no instructions, some of the parts were missing and the box had been partially eaten by snails.
But we weren’t going to let those sorts of details put us off trying to erect the tunnel cloche we inherited from the previous plot holder.
And besides, the greenhouse was overflowing with plants and the risk of frost diminishing daily. It was time to think about moving our plants to the plot. We would need a structure to give them a little bit of protection while they were hardening off.
What was missing?
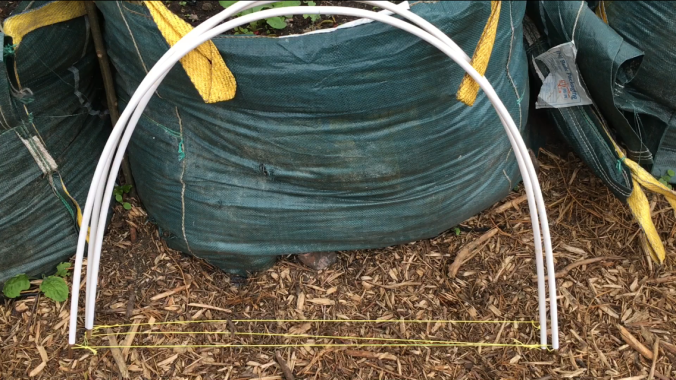
As far as we could tell, the missing parts were connectors that should have joined the rods together, transforming 14 straight tubes into 7 hoops.
We solved this with a length of aluminium pipe which we bought in a DIY store and cut into short lengths of about 7cm (3in). We pushed two of the tunnel’s rods on to either end of a section of aluminium.
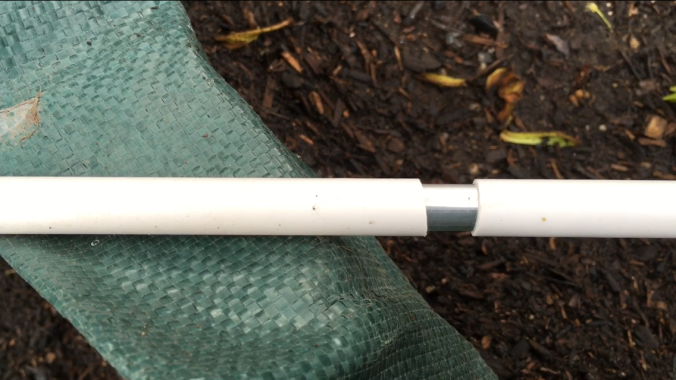
The rods could then be bent and we used string to make them hold their shape.
Forming the tunnel
The tunnel cloche rods are probably supposed to be pushed into the ground. But we didn’t want to do that, mainly because most of our plot is covered in a geo-textile that we didn’t want to puncture.
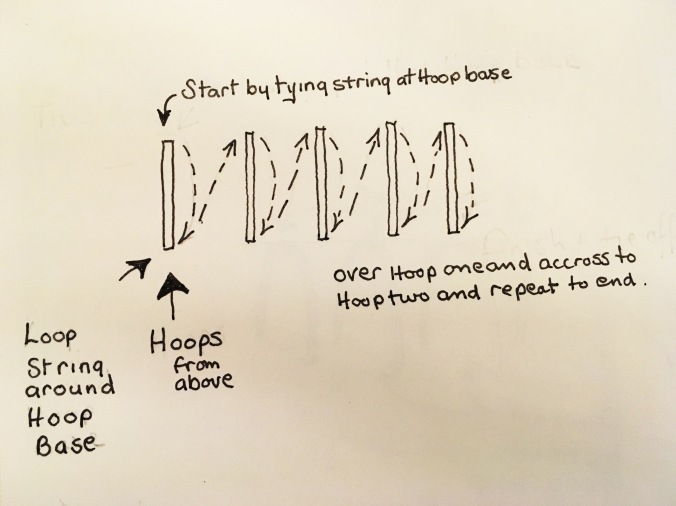
This meant that we had to secure the hoops with string, letting out a length of string then tying a knot at the top of each arc. This created a series of linked hoops looking like an enormous undernourished caterpillar – see diagram.
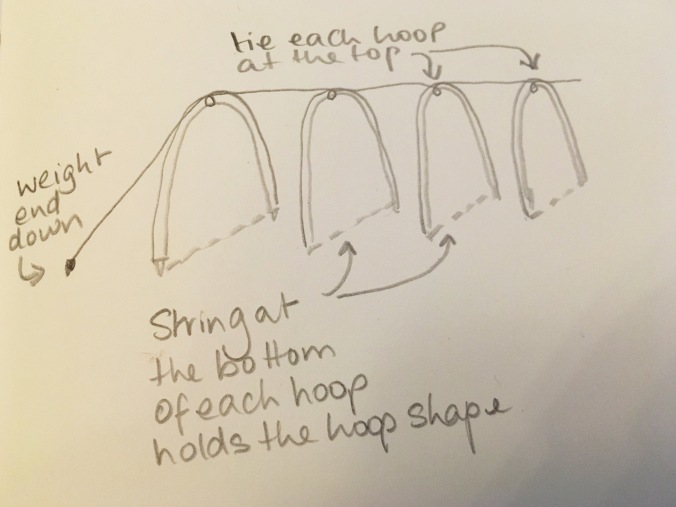
Tip: lay out the plastic first so you don’t make the caterpillar too long!
This was not difficult to put together but it helped having two pairs of hands.
We then laid the plastic over the hoops, weighing it down at at both ends. Finally, we tied string around each of the legs, zig zagging it over the top so that the plastic was secured between two layers of string.
Setting out the string in the manner makes it easy to move the plastic up and down to get into the tunnel.
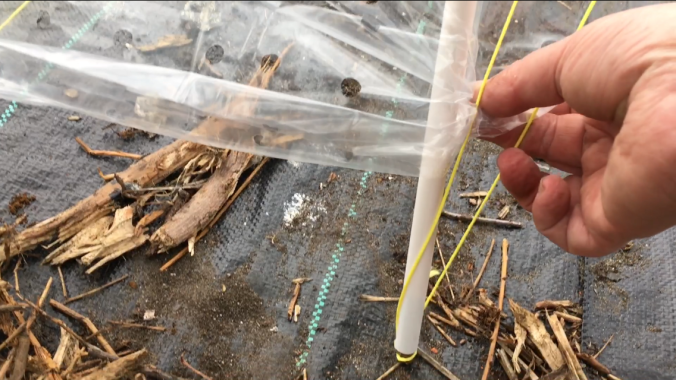
It’s easier to show than to describe so do have a look at the video to see how it all went together.
The final structure is much sturdier than I expected – and the plants seem to like it too.

That looks familiar, I got given a fruit cage frame with no net, or instructions. I made something useable by making my own base frame. 3 random bits left over. Bit like when I take the car to bits!!
LikeLiked by 1 person
Ha ha! Too funny!
LikeLike
Pingback: New blog post: End of May round up and tour of the plot | The Quest for Veg